[lwptoc]
1. Complaint Management
In complaint management we have added a new feature with advanced and flexible use of portal and application. The changes are made in the complaint form and complaint report, both are dynamic now.
a. Setting>>Complaint service>> preference:
In preferences there will be default form and if user need to add new form, then need to click on “+Complaint form”. Where users have to add a few mandatory options as mentioned below.
- i. Title
- ii. Assets flow
- iii. Activity name
- iv. Type of value
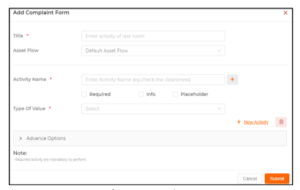
There are few advanced options, by selecting users can create the form easily which are mentioned below.
i. Do you need to assignee flow?
ii. Do you need assets options to create?
- 1. Do you need mandatory equipment category?
- 2. Do you need mandatory equipment?
- 3. Do you need mandatory brands?
- 4. Do you need mandatory models?
- 5. Do you need mandatory serial no?
iii. Do we need an assignment to start a flow in complaint management
(without acceptance and decline)?

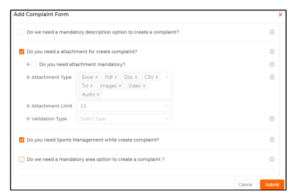
iv. Do we need a mandatory description option to create a complaint?
v. Do you need an attachment to create a complaint?
vi. Do you need an attachment mandatory?
- 1. Attachment type
- 2. Attachment limit
- 3. Validation
vii. Do you need a location management option while creating the
complaint?
viii. Do you need mandatory area option while creating the complaint?
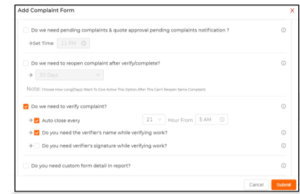
ix. Do we need pending complaints & quote approval pending complaints
notification?
1. Set time
x. Do we need to reopen complaint after verify/complete?
1. Select days
xi. Do we need to verify complaints?
- 1. Auto close verify
- 2. Do you need the verifier’s name while verifying work?
- 3. Do you need verifier’s signature while verifying work?
xii. Do you need custom form details in report?
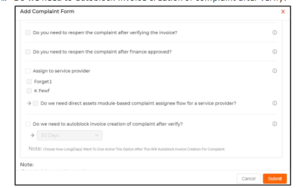
xiii. Do you need to reopen the complaint after verifying the invoice?
xiv. Do you need to reopen the complaint after finance is approved?
xv. Assignment to service provider?
xvi. Do we need direct assets module-based complaint assignee flow for a
service provider?
xvii. Do we need to autoblock invoice creation of complaint after verify?
Then submit the complaint form successfully.
b. Setting>>Complaint Service>> Complaint Report
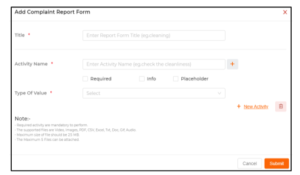
In report we have provided the option of creating complaint report for custom by click on “+Complaint Report”.
i. Title
ii. Activity name
- 1. Required
- 2. Info
- 3. placeholder
iii. Type of value
c. Complaint Work Flow
In complaint work flow, there user needs to select the complaint work flow to complete any complaint.
i. Default Active service type
- 1. Complaint report
- 2. Preventive maintenance report
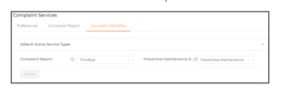
ii. Complaint work flow
1. Default Setting Type
2. Service Report Header Details
- a. Image
- b. Address
- c. Title
- d. Customer report no
- e. Date
3. Complaint Details
- a. Customer name
- b. Title
- c. Created by
- d. Created on
- e. Complaint no
- f. Description
4. Location Details
- a. Location name
- b. Area
- c. City
- d. Opening date
- e. Store Email
- f. Store ID
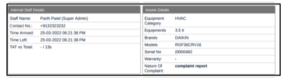
5. Internal Staff
- a. Staff name
- b. Contact no
- c. Time arrived
- d. Time left
- e. TAT vs Total
6. Service Provider Details
- a. Staff name
- b. Contact no
- c. Time arrived
- d. Time left
- e. TAT vs Total
7. Important Notes by Service Provider
- a. Name
- b. Update
- c. Place holder
8. Assets Details
- a. Assets flow
- b. Equipment
- c. Equipment category
- d. Brand
- e. Models
- f. Serial no
- g. Warranty
- h. Nature of issue
9. Work Description by Service Provider
10. Important Note by Customer
- a. Name
- b. Update
- c. Place holder
11. Part Replaced
- a. Category
- b. Item
- c. Price
12. Activities
- a. Name
- b. Role
- c. Comment
- d. Status
- e. Date
13. Attachment
- a. Image
- b. Uploaded by
- c. Role
- d. File type
- e. Date
14. Time Sheet Details
- a. Total time
- b. Work accept
- c. Quotation time
- d. Work time
- e. Verify time
15. Signature Details
- a. Signature
- b. Name
- c. Date
- d. Work completed by
16. Footer Details
d. Main Modules>>Complaint Management
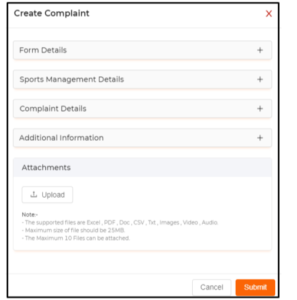
In complaint management while creating the complaint user need to create the complaint based on above customer setting, so for creating need to follow below steps
- i. Click on “Create complaint”
- ii. Select form “Form list”
- iii. Select “Location Management”
- iv. Add “Complaint Title”
- v. Add “Description”
- vi. Add “Additional Information”
- 1. Complaint by
- 2. Department
- 3. Clean office
- vii. Add Attachment
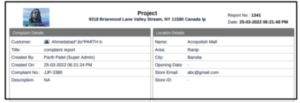
Once the complaint is successfully submitted with the details below then the common flow to (accept, decline, delete, start, pause, complete) will work and then changes will be made while creating the report based on setting. The report will having the below details:
i. Complaint Details
i. Customer name
ii. Title
iii. Created by
iv. Created on
v. Description
ii. Location Details
i. Name
ii. Area
iii. City
iv. Opening date
v. Store Email
vi. Store ID
iii. Internal Staff
i. Staff name
ii. Contact no
iii. Time arrived
iv. Time left
v. TAT vs Total
iv. Assets Category
i. Equipment Category
ii. Equipment
iii. Brands
iv. Models
v. Serial no
vi. Warranty
vii. Nature of issue
viii. Work Description
1. Description
ix. Customer Details
1. Important notes by customer
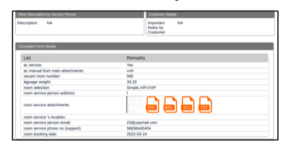
x. Complaint From Details
- 1. AC service
- 2. AC manual
- 3. Vacant room number
- 4. Language weight
- 5. Room selection
- 6. Room service person address
- 7. Room Service Attachment
- 8. Room service location
- 9. Room Service Phone no
- 10. Room booking date
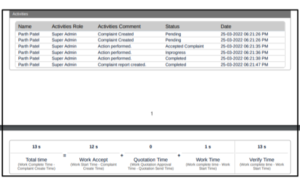
xi. Activities
- 1. Name
- 2. Activities role
- 3. Activities comment
- 4. Status
- 5. Date
xii. Work Flow Time
- 1. Verify time
- 2. Work time
- 3. Quotation time
- 4. Work accept
- 5. Total time
2. Assets Management
a. Staff Base Multiple Flow
In Assets Management, if user select any assets flow as super admin than flow will be saved. If any of user get login more than once, all the flow will be selected and the modules of portal will be based on that flow.

3. SCA (Store Condition Assessment):
In SCA have added multiple features and easy to use option which are mention bellowed:
a. Edit Report:
In SCA once the ticket gets complete and the user needs to create the report and once the report is created successful after that user can edit that report if needed
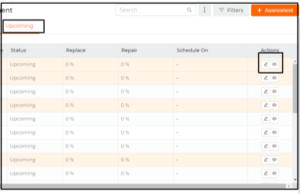
b. Upcoming Edit:
In the upcoming tab we have provided the edit option for editing the task.
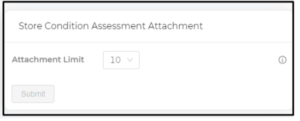
c. Attachments:
In setting>>SCA, we have provided the option to add the attachment’s dynamic based on selection of setting.
4. Staff Management
In staff Management we have added a few improvements which are mentioned below
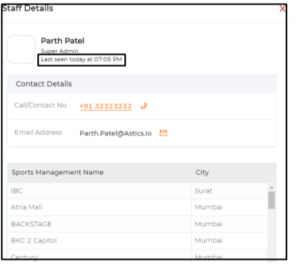
a. Staff Last Seen:
We have provided a feature where one staff can see/view the last seen of another staff, by viewing. The staff details as shown in the image below:
b. Staff Management Location Base:
In Staff Management the staff can only view the staff list which has the same location, other location staff will not display, and also can see those location which is located to them from staff management.
5. Service Provider Management:
In the service provider we have 2 improvements implemented which are mention bellowed.
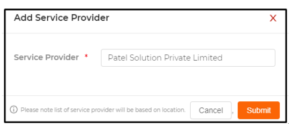
a. Location Based Service Provider:
In Service provider management we have provided the option, that location-based assets should be displayed.
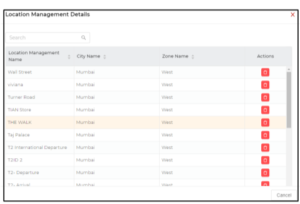
b. Required Location Column:
In Location management there is an option, where the user can view the location name in column.

6. Task Management:
In task management we have added the advance option where users can have multiple options for completing the task, also can have location base task management.
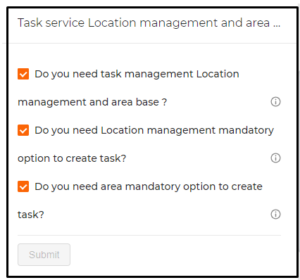
a. Setting>>Task Management:
In task management there is the option of creating tasks based on location management and area,
- i. Do you need task management Location management and area base?
- ii. Do you need a Location management mandatory option to create task?
- iii. Do you need an area mandatory option to create tasks?
By default, the service will be off and once the user activates the service then the task will be created based on location.
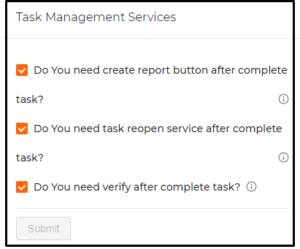
b. Setting>> Task Management:
In Setting there will be a few more services for custom task management, with status and button which is mentioned below:
- i. Do You need create report button after complete task?
- ii. Do You need task reopen service after complete task?
- iii. Do You need verify after complete task?
By default, the service will be off, once the user is on the service then based on that service then the user can verify, reopen and report options.
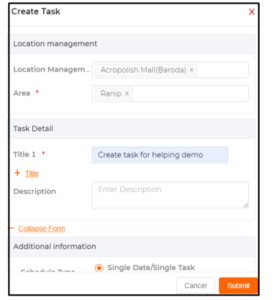
c. Side Menu>>Task Management >></h3 In task management module there will option to Click on “+Task Management”, User need to select the location and the Area, after that need to select additional information if needed then need to submit the task.
-
- i. Step 1: Create Task
-
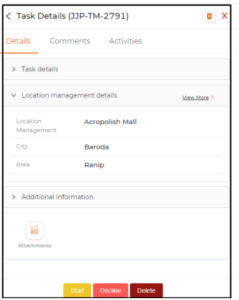
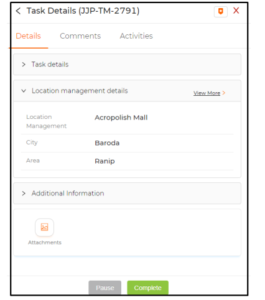
- ii. Step 2: Click on the details screen and user will get the location information and there are 3 buttons which start, decline, delete.
-
- iii. Step 3: Start the task from detail screen
- iv. Step 4: Once the task is started the status will be in progress and the task will show 2 buttons which are paused or completed.
-
- v. Step 5: Once the user completes the task then there will be an option to create the report, where the user needs to add the signature.
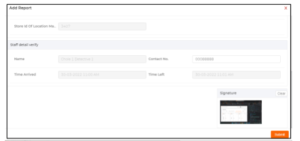
-
- vi. Step 6: Once the task is completed then it will be there in a completed tab, where in detail screen have 2 button re-open and verify.
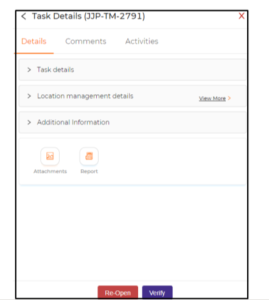
- vii. Step 7: Once the task is completed the user can re-open the task, if user re-open the task, then it will start from “step 2”, and if the user verify it then compete successfully completed. Then there will be no button, only details will be shown in task detail screen.
7. Budget and Expense:
In budget and expense we have added the flow of approval and reject, based on setting which flow is mentioned below:
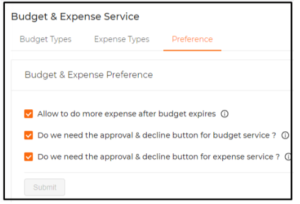
a. Setting>>Preference:
In Budget and Expense there we have added the option of will service which will off by default once the user on the service then below service:
i. Allow me to do more expense after budget expires
ii. Do we need the approval & decline button for budget service?
iii. Do we need the approval & decline button for expense service?
b. Side Menu>> Budget and Expense>> Budget:
Bellow are the steps to follow to work on new flow of budget.
i. Step 1: Create budget (Add staff, Budget type, add amount, Remark, Attachment) and submit
ii. Step 2: In budget detail screen there will be 2 buttons to approve or decline the budget request.

iii. Step 3: If the user Decline, then user needs to add the reason and if user Approve then the status will be updated to approve
c. Side Menu>> Budget and Expense>> Expense:
Bellow are the steps to follow to work on new flow of expense.
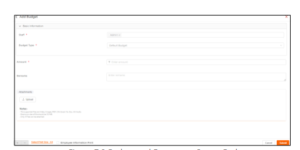
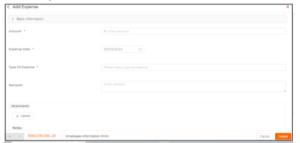
i. Step: 1 Create expense with (select staff, select expense type, Enter Amount, Select Expense Date, Select Type of expense, addremark, add attachment) and submit.
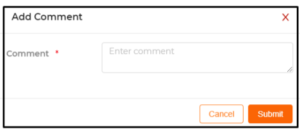
ii. Step 2: Once the expense is created then there will be 2 buttons for approval and decline the expense ticket.
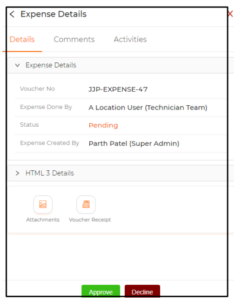
iii. Step 3: If the user Decline, then user needs to add the reason and if user Approve then the status will be updated to approve

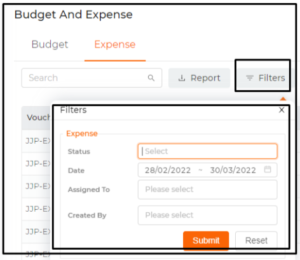
d. Filter option for budget and expense:
In budget and expense we have the option where user can select filter.
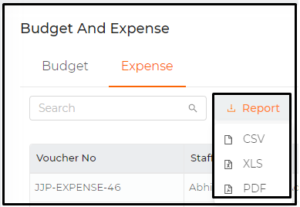
e. Report:
In reports we have the option where users can create reports in different formats and also in Guajarati languages the formats are CSV, Excel, PDF.
8. Improvements:
We have completed many improvements in application and web with more user-friendly options which are mention bellowed.
a. Common Improvement
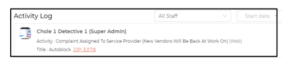
i. Activity log for Service Provider (web + App): If complaint or preventive maintenance is assigned to any service provider then user can view service provider name in place of service provider.
ii. Setting: Notification setting for task management
b. Web Improvement
i. Complaint Management (web): check unwanted API calling in complaint need to remove
ii. Preventive Maintenance (Backend): PM setting pagination and grouping
iii. Preventive Maintenance Setting: In Preventive Maintenance Setting flow should be enabled on edit, so now it is possible to edit.
iv. Notification: Complaint pending reminder 4 times comes at a set time
v. Preventive Maintenance: PM report download bugs
vi. Expand Collapse: Detail screen Expand and collapse for all modules
c. Android Improvement:
i. Make all adapter filters with for loop instead of RxObserver
ii. Make all shared preference stores with encryption.
iii. All role based true and false value get only when it needed
d. IOS Improvement:
i. Make all shared preference store with encryption.
ii. LinkedIn loader same as integration TeroTAM
iii. Required Label Sequence all place same
iv. Splace Screen Any Alert getting time App Stuck in Spalce screen these
issues is some time
v. Overview jump show filter and other changes – iOS
9. Bugs:
In production the bugs are reported which are mentioned and solved in the
current solution.
a. Analytics>> Report:
Report filter: If user do select all then download report file,
assets field, NA show
b. Analytics>> Complaint Count:
Analytics Complaint chart count not update when
user created complaint from old apps
c. Assets Management:
i. Case category with same name just different alphabet size is being taken in the system e.g. Other and other
ii. Other’ or ‘others’ case category is not found while deleting and moving the case category. Attached images for reference